C++
C++
VisualStudio2019 相关
为什么VS中会建议宏转换为constexpr?
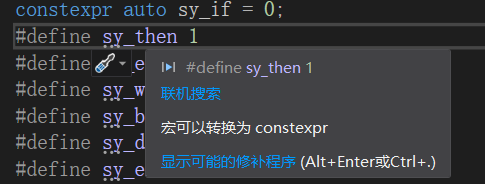
宏是由预处理器而非编译器解析的,比如不能用命名空间,所以使用后必须解除
以及宏很容易带来各式各样的错误,最简单如括号上的错误,还有宏会导致debug困难等等
constexpr
节选自:constexpr 的来龙去脉-云科普blog (winkp.com)
关键字
constexpr(constant expression) 是在 C++11 中引入的,并且在 C++14 中进行了优化。constexpr和const一样可以用来修饰变量:试图修改constexpr变量时,编译器将会报错。不同于
const,constexpr还可以修饰函数和类的构造函数。constexpr表示值或者返回值是常量,并且如果可能,在编译时计算它们。一个
constexpr整型值能够用在任何const整型值可以用的地方,例如模板参数和数组的申明。当值在编译时计算而不是运行时计算时,它能够使程序运行得更快,并使用更少的内存。
为了限制编译时常量计算的复杂性,以及其对编译时间潜在的影响, C++14 标准需要
constexpr类型必须为字面值类型。
1、字面值常量:一个形如42的值被称作字面值常量,这样的值一望而知。每个字面值常量都对应一种数据类型,字面值常量的形式和值决定了它的数据类型,包含:
整型和浮点型字面值 字符和字符串字面值 布尔字面值和指针字面值: bool test = false; nullptr是指针字面值;
———————————————— 版权声明:本文为CSDN博主「十一月zz」的原创文章,遵循CC 4.0 BY-SA版权协议,转载请附上原文出处链接及本声明。 原文链接:https://blog.csdn.net/baidu_35679960/article/details/78934193
应该使用 constexpr 的场景
- 只要允许,尽可能使用
constexpr,当值在编译时计算而不是运行时计算时,它能够使程序运行得更快,并使用更少的内存。
不应该使用 constexpr 的场景
constexpr是对象或者函数接口的一部分,所以如果你使用了constexpr但反悔了,移除constexpr可能会导致大量的调用代码编译失败。(比如添加 I/O 操作用于调试或者性能调优可能导致这样的问题,因为 I/O 语句通常不是在constexpr函数中执行的。)
auto
- 从初始化表达中推导出已声明变量的类型。
- 从
Visual Studio 2010开始,**auto**关键字宣布一个变量,其类型是从声明的初始化表达中推断出的
C4996
- 使用的函数是过时了已被弃用的函数
strcpy_s
strcpy_s(str, strlen(str1)+1, str1);
#pragma once
用 VS 新建 .h 头文件时会自动在首行生成一个
#pragma once
pragma: 编译指示, 杂注
- 使用
#pragma once可以减少build次数, 因为编译器会在该文件第一次被#include时打开并读取该文件并且之后不再重读读取
VSCode
在 VSCode 中调试 C++ 程序
使用 VS 的 cl.exe
VS Code:使用VS的cl.exe编译运行C/C++程序_北冥有鱼wyh的博客-CSDN博客
VS:在windows上调用cl.exe编译运行C/C++程序 - 简书 (jianshu.com)
从 VS 的 工具 -> 获取工具和功能 唤醒 Visual Studio Installer

查看自己的 VS 的安装目录

我这里的路径是:
C:\Program Files (x86)\Microsoft Visual Studio\2019\Community下面配置环境变量要用到
打开 此电脑 -> 属性 -> 高级系统设置 -> 环境变量 并按照如下所示修改 系统变量
// 编辑 Path 变量, 添加如下路径, 注意这里的 VS 目录就是上一步找到的目录
C:\Program Files (x86)\Microsoft Visual Studio\2019\Community\VC\Tools\MSVC\14.29.30037\bin\Hostx86\x86

// 新建 INCLUDE 变量并加入如下配置(每条配置间用;隔开)(其实输完第一条配置且加了;并回车确定后再编辑该环境变量就会有编辑弹窗可以一条条新建了); 需要留意的是如果你的 VS 是装在 C:\Program Files 里的那么这里的 Windows Kits 文件夹可能就在 C:\Program Files 目录中
C:\Program Files (x86)\Microsoft Visual Studio\2019\Community\VC\Tools\MSVC\14.29.30037\include
C:\Program Files (x86)\Windows Kits\10\Include\10.0.17763.0\shared
C:\Program Files (x86)\Windows Kits\10\Include\10.0.17763.0\ucrt
C:\Program Files (x86)\Windows Kits\10\Include\10.0.17763.0\um
C:\Program Files (x86)\Windows Kits\10\Include\10.0.17763.0\winrt

// 新建 LIB 变量并加入如下配置
C:\Program Files (x86)\Microsoft Visual Studio\2019\Community\VC\Tools\MSVC\14.29.30037\lib\x86
C:\Program Files (x86)\Windows Kits\10\Lib\10.0.17763.0\um\x86
C:\Program Files (x86)\Windows Kits\10\Lib\10.0.17763.0\ucrt\x86
修改完这些变量后依次按确定关闭打开的窗口以保存修改
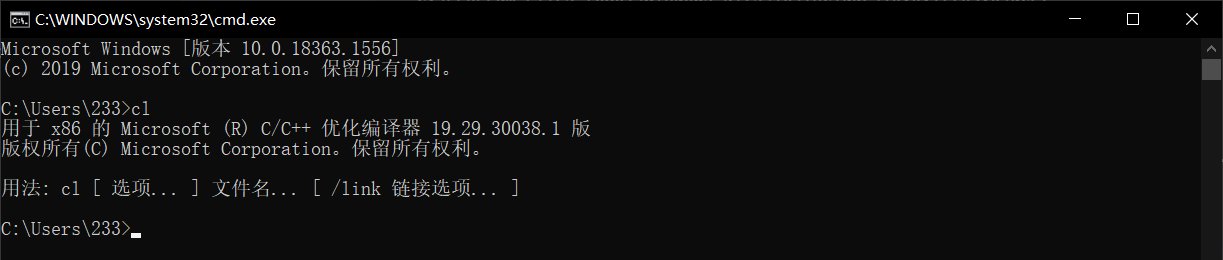
win + R -> cmd 并回车打开命令行窗口, 输入 cl 并回车, 如下所示查看是否配置成功
重启 VSCode 以加载新的环境变量
新建一个目录并使用 VSCode 打开(因为会在 VSCode 当前打开文件夹的根目录下自动生成配置文件, 所以这里先新建一个干净的目录再用 VSCode 打开以免污染外围环境)
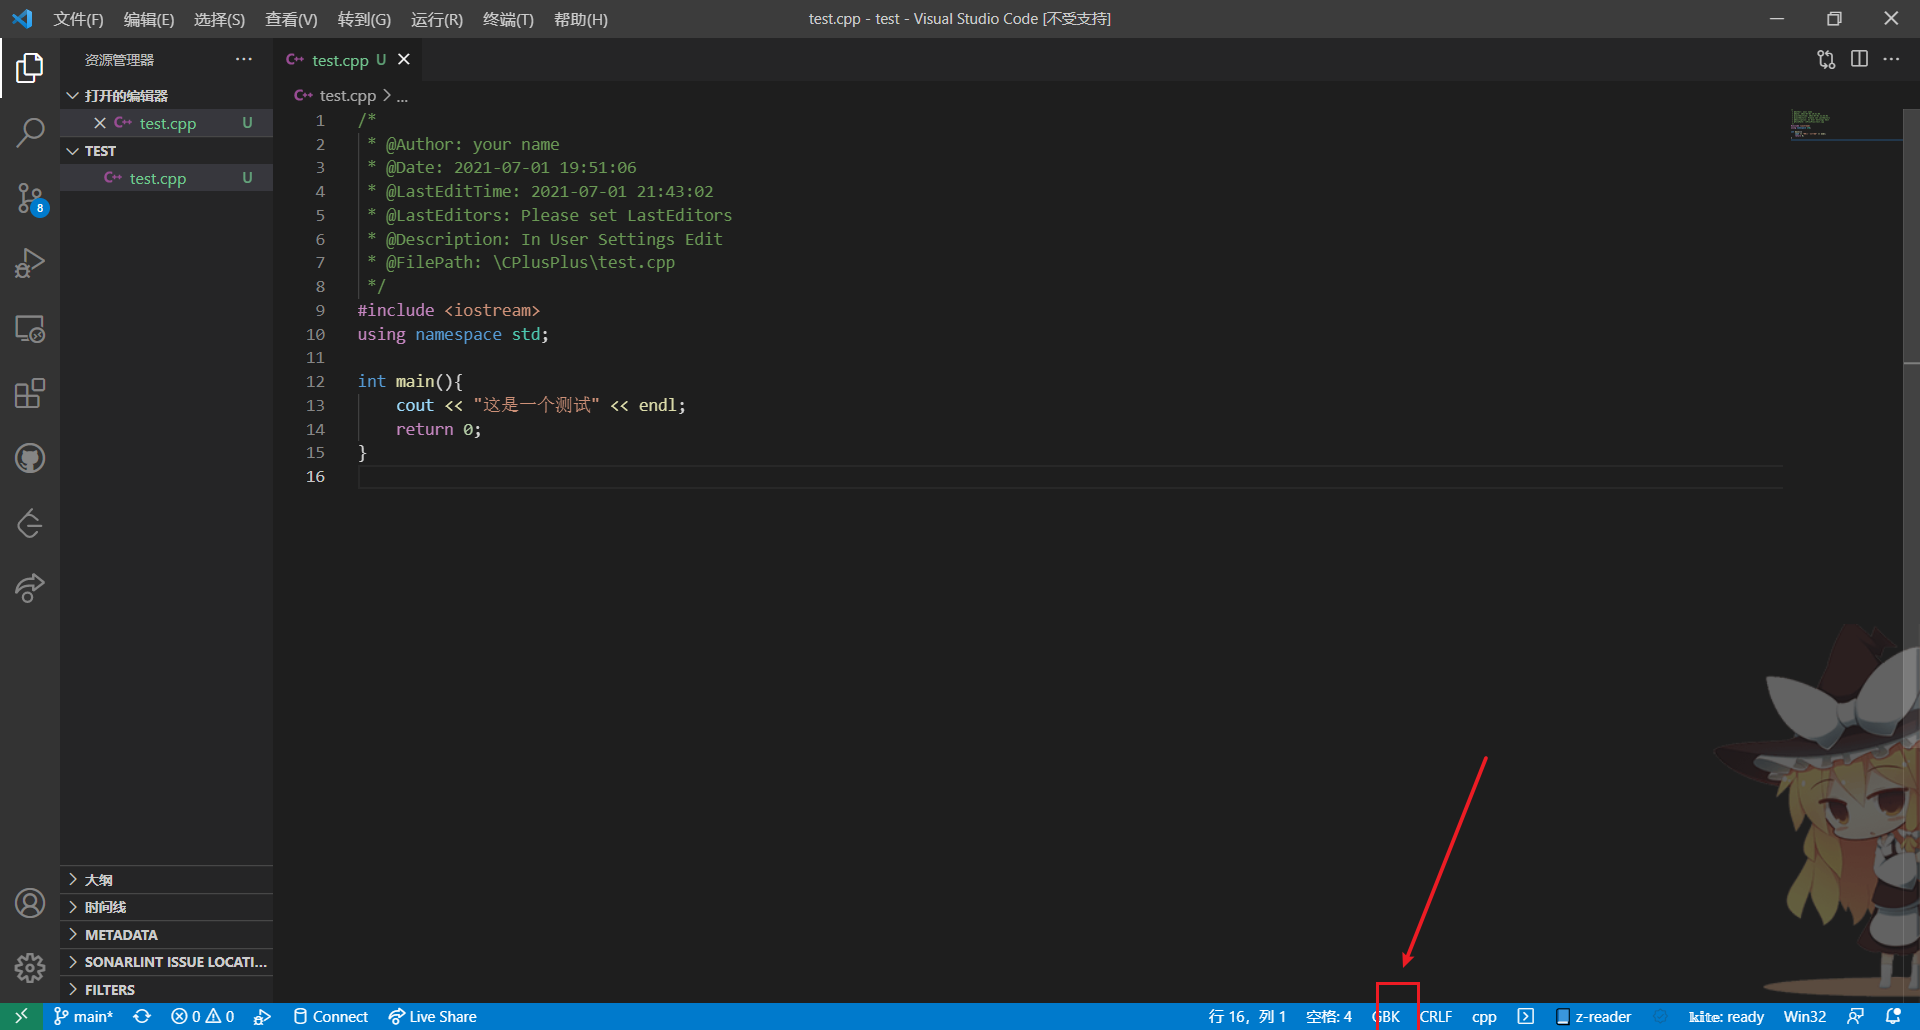
新建一个测试用的 cpp 文件如 test.cpp 并将编码调为 GBK (这个我没找到适配 UTF-8 的适配方案, 是一个从我用 VS 来就存在的严重问题.....)
#include <iostream>
using namespace std;

int main(){
    cout << "这是一个测试" << endl;
    return 0;
}
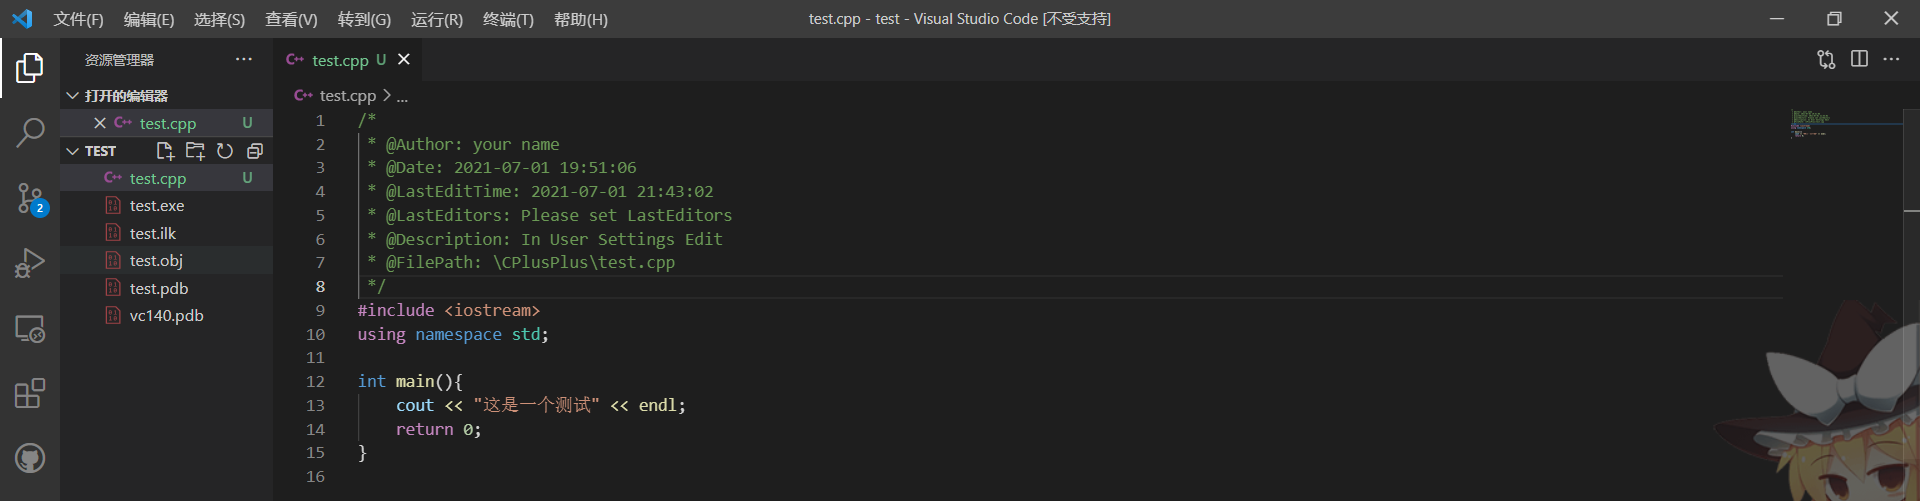
使用 Ctrl + Shift + B 快捷键会唤起该窗口, 选择该项则会在侧边生成编译链接文件

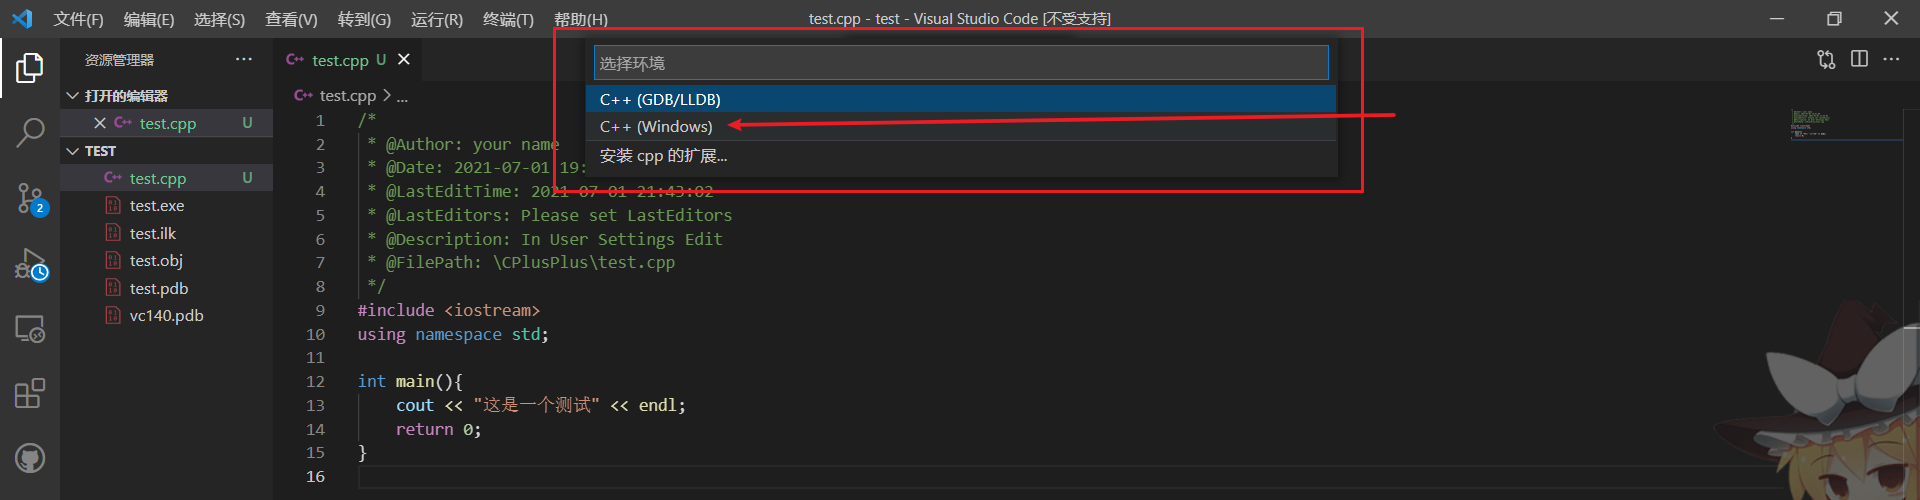
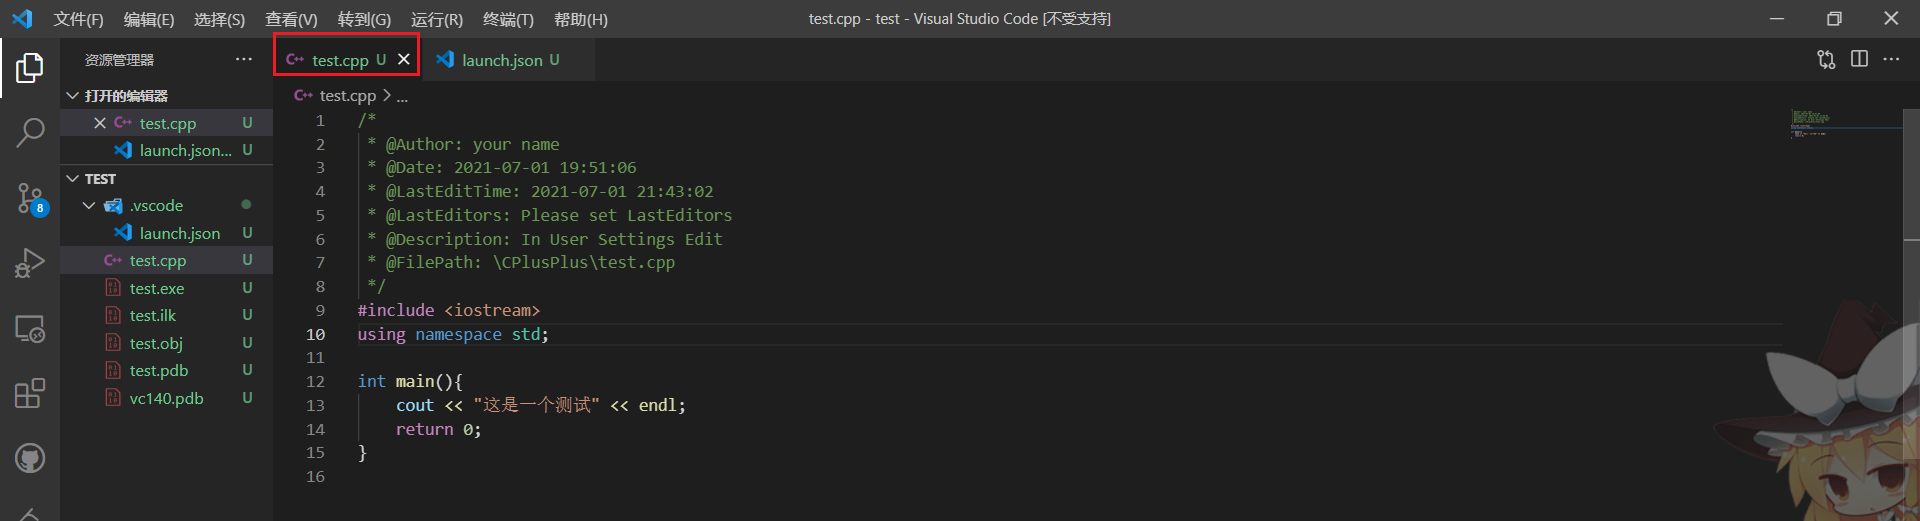
使用 F5 快捷键唤起该窗口并选择 C++ Windows -> cl.exe 会在当前 VSCode 打开的文件夹的根目录下生成一个含有 launch.json 文件 的 .vscode 文件夹


json 文件内容如下:
{
    // 使用 IntelliSense 了解相关属性。
    // 悬停以查看现有属性的描述。
    // 欲了解更多信息,请访问: https://go.microsoft.com/fwlink/?linkid=830387
    "version": "0.2.0",
    "configurations": [
        {
            "name": "cl.exe - 生成和调试活动文件",
            "type": "cppvsdbg",
            "request": "launch",
            "program": "${fileDirname}\\${fileBasenameNoExtension}.exe",
            "args": [],
            "stopAtEntry": false,
            "cwd": "${fileDirname}",
            "environment": [],
            "console": "externalTerminal",
            "preLaunchTask": "C/C++: cl.exe 生成活动文件"
        }
    ]
}
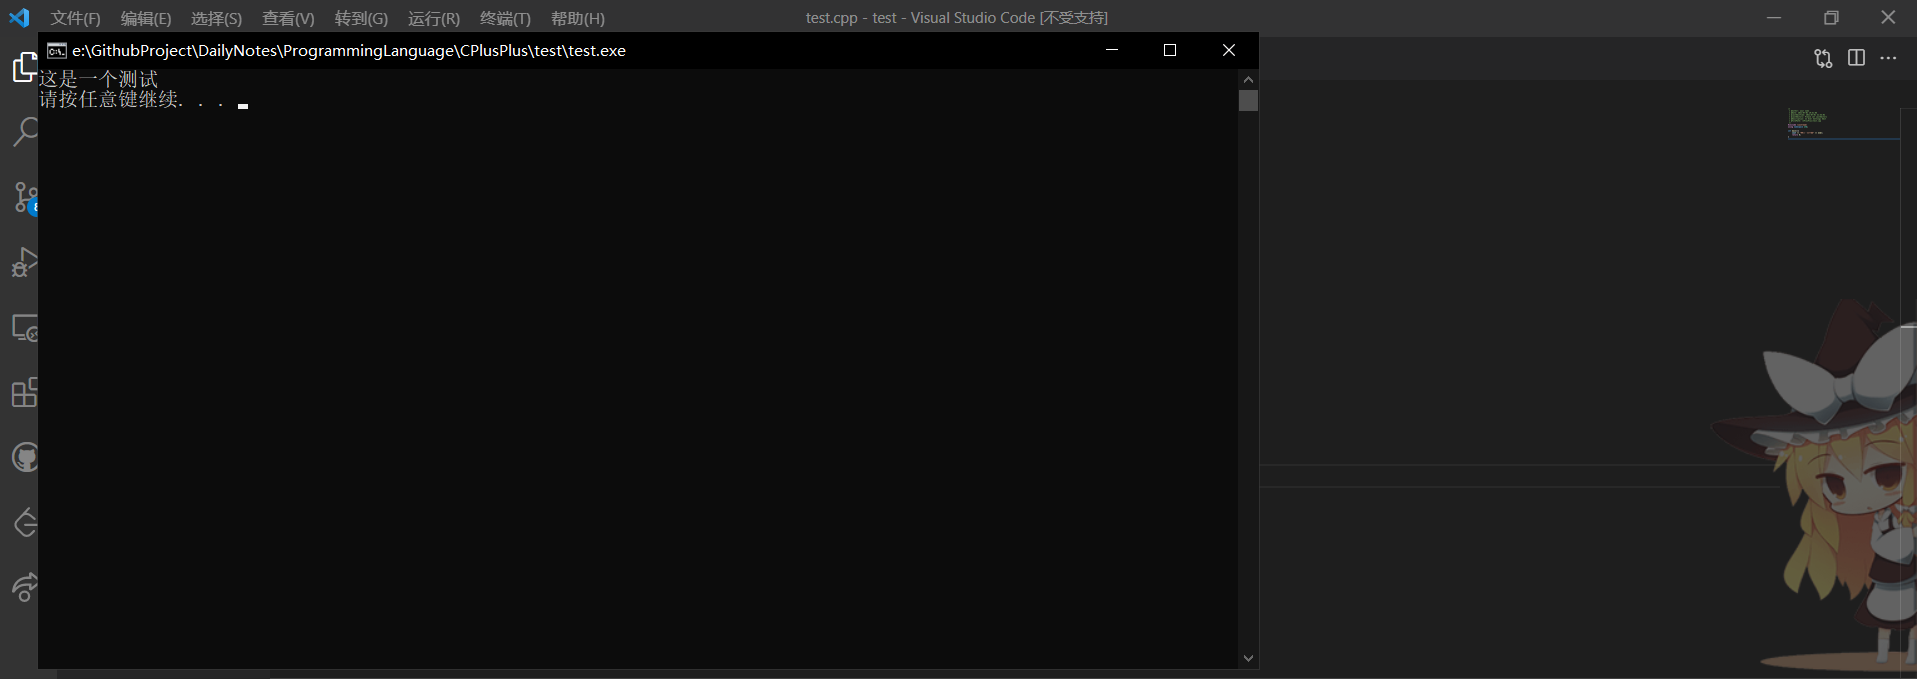
将标签页切换回 test.cpp 并再次按 F5 以执行生成的可执行文件
使用 gcc
配置VSCode中调试C/C++环境 | LeoJhon.Song's Blog (leojhonsong.github.io)
Get Started with C++ and Mingw-w64 in Visual Studio Code
C++ programming with Visual Studio CodePS: 一般按照上面第三个链接可以较为快捷地完成配置并运行 C++ 程序, 但是有时候配置项可能会出些问题, 所以下面简单描述下
检查
gcc,gdbgcc --version gdb --version如果没有返回版本信息则说明未安装或配置其环境变量, 参阅 C++ programming with Visual Studio Code --- 使用 Visual Studio Code 进行 C++ 编程 C++ programming with Visual Studio Code-example-install-mingwx64 完成其安装及环境变量的配置
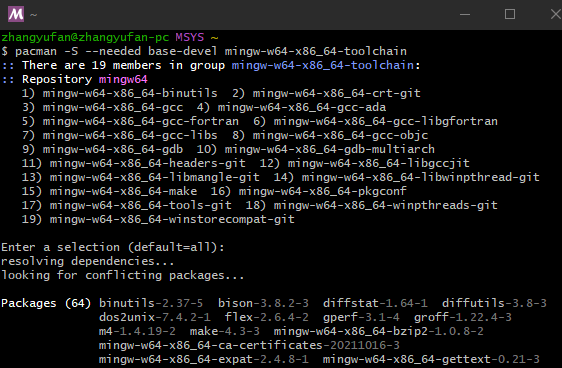
简单来说就是下载 [msys](https://objects.githubusercontent.com/github-production-release-asset-2e65be/80988227/4fdf0417-d097-4519-854b-133188c60e38?X-Amz-Algorithm=AWS4-HMAC-SHA256&X-Amz-Credential=AKIAIWNJYAX4CSVEH53A%2F20230613%2Fus-east-1%2Fs3%2Faws4_request&X-Amz-Date=20230613T095929Z&X-Amz-Expires=300&X-Amz-Signature=e434be09c0fc8a6700ce1027ae10bea8e2078b50c4f75167a9ed1f0895b82fcc&X-Amz-SignedHeaders=host&actor_id=59549826&key_id=0&repo_id=80988227&response-content-disposition=attachment%3B filename%3Dmsys2-x86_64-20220603.exe&response-content-type=application%2Foctet-stream), 在弹出的窗口中使用
pacman -S --needed base-devel mingw-w64-x86_64-toolchain安装工具链MSYS (Minimal SYStem) 是一个轻量级的类 Unix 环境,是为 Windows 平台提供的一个集成开发环境。它是一种方便 Windows 用户模拟 Linux 环境和使用一些 Linux 工具的解决方案。
MSYS 最初是为了支持 MinGW (Minimalist GNU for Windows) 而创建的。MinGW 是一个用于生成 Windows 应用程序的 GCC 编译器的轻量级分发版,它不依赖于任何 Unix 系统,而 MSYS 提供了一些帮助 MinGW 工作的 Unix 工具,如 bash shell,以及许多常见 Unix 工具如 grep,sed,awk 等。
总的来说,MSYS 是一个简化的 POSIX/SUS 兼容的 Bourne shell 命令行解释器环境。使用它,开发者可以在 Windows 上运行自动化构建脚本,例如 Bash 脚本和 Makefile 等,从而使在 Windows 上编译 Unix 和 Linux 软件变得更加容易。
将
msys64\mingw64\bin加到Path环境变量中重启 VSCode 加载环境变量即可安装 C++ 扩展
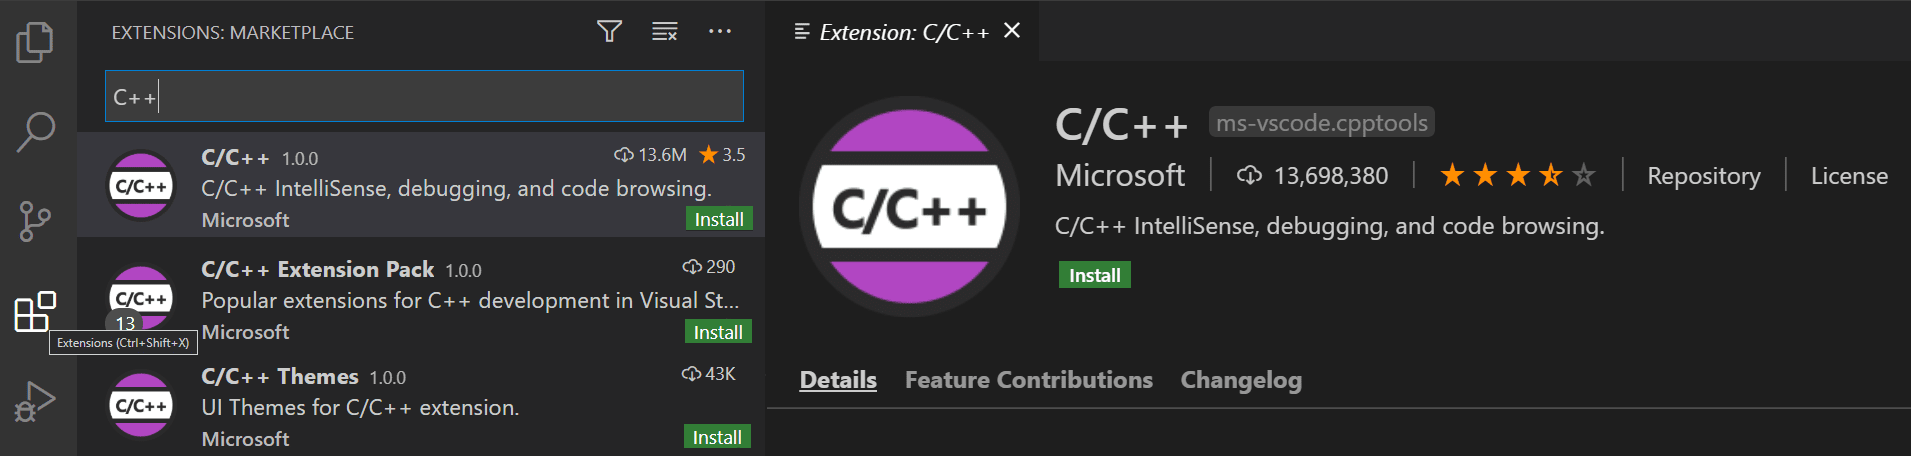
使用 VSCode 打开一个文件夹作为 C++ 工作区, 新建并编辑一个 cpp 文件, 程序编写完成后使用
Ctrl + Shift + B快捷键调出build task窗口如果看到的是这样的窗口那么直接选择 g++ 那项即可
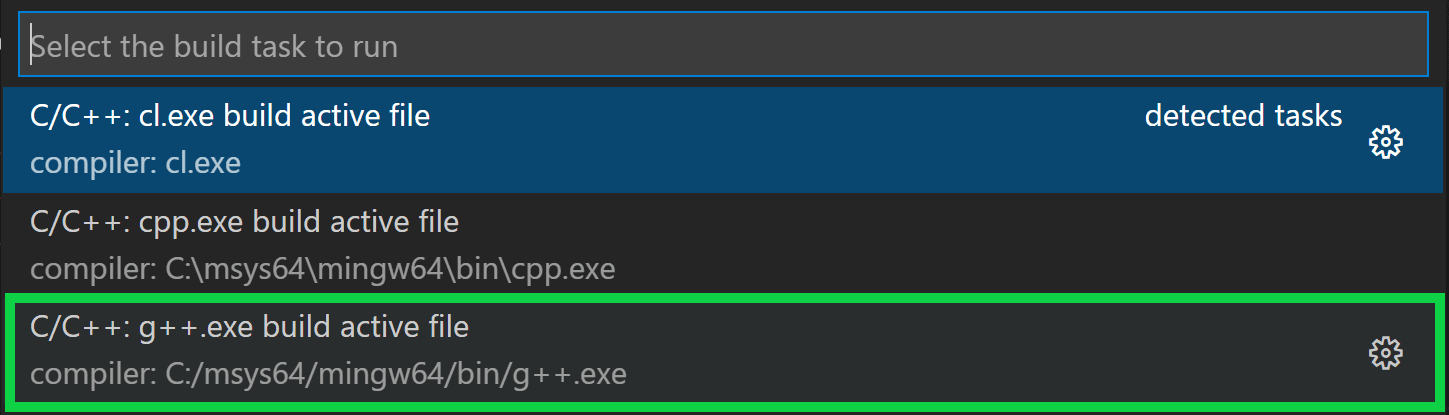
如果没有看到检测到的项目而是让自定义配置文件的话那么可以参考 配置VSCode中调试C/C++环境 | LeoJhon.Song's Blog (leojhonsong.github.io) 中的配置项
配置备份:
tasks.json{ // See https://go.microsoft.com/fwlink/?LinkId=733558 // for the documentation about the tasks.json format "version": "2.0.0", "tasks": [ { "label": "Compile", "type": "shell", "command": "gcc", "args": [ "${file}", "-o", "${fileDirname}/${fileBasenameNoExtension}.exe", "-g", "-Wall", "-std=c++17", "-lstdc++" ], "group": { "kind": "build", "isDefault": true } } ] }launch.json{ // Use IntelliSense to learn about possible attributes. // Hover to view descriptions of existing attributes. // For more information, visit: https://go.microsoft.com/fwlink/?linkid=830387 "version": "0.2.0", "configurations": [ { "name": "(gdb) Launch", "type": "cppdbg", "request": "launch", "program": "${workspaceFolder}/${fileBasenameNoExtension}.exe", "args": [], "stopAtEntry": false, "cwd": "${workspaceFolder}", "environment": [], "externalConsole": false, "MIMode": "gdb", "miDebuggerPath": "gdb.exe", "miDebuggerArgs": "-q", "setupCommands": [ { "description": "Enable pretty-printing for gdb", "text": "-enable-pretty-printing", "ignoreFailures": true } ], "preLaunchTask": "Compile" } ] }
gcc std 报错: c++ - undefined reference to 'std::cout' - Stack Overflow
实用工具
快捷生成函数调用关系图
- 之前也接触过快速生成 python 文件的函数关系调用图, 记得是 [code2flow](scottrogowski/code2flow: Pretty good call graphs for dynamic languages (github.com))
callgraph
Ubuntu
目前在网上只找到了 Ubuntu 的使用方案
流程
安装
cflow和graphvizsudo apt-get install cflow graphviz然后在合适的位置创建两个文件 tree2dotx 和
callgraph文件中的内容分别如下:
tree2dotx:#!/bin/bash # # callgraph -- Generate a callgraph of a specified function in specified file/directory # # -- Based on cflow and tree2dotx # # Usage: # # $ callgraph # # -f func_name # -d directory|file # -F filterstr # -D depth # -o directory # # # Output: ../callgraph/func.dir_file_name.svg # # OS OS=$(uname) # Tree2Dot TOP_DIR=$(cd $(dirname $0) && pwd)/ tree2dotx=${TOP_DIR}/tree2dotx # Output directory OUT_DIR=${TOP_DIR}/../callgraph [ ! -d $OUT_DIR ] && OUT_DIR=./ PIC_TYPE=svg # Get browser if [ "x$OS" == "xDarwin" ]; then BROWSER=/Applications/Safari.app/Contents/MacOS/Safari else BROWSER=chromium-browser fi # Default setting # Input: Function Name [Directory Name] func=main dir=./ # Default depth of the tree depth= # filterstr for tree2dotx filterstr="" # Usage function usage { echo "" echo " $0 " echo "" echo " -f func_name" echo " -d directory|file" echo " -F filterstr" echo " -D depth" echo " -o directory" echo "" } while getopts "F:f:d:D:o:b:h" opt; do case $opt in F) filterstr=$OPTARG ;; f) func=$OPTARG ;; d) [ -n "$OPTARG" ] && [ -f "$OPTARG" -o -d "$OPTARG" ] && dir=$OPTARG ;; D) depth=$OPTARG ;; o) output=$OPTARG [ ! -d "$output" ] && mkdir -p $output OUT_DIR=$output ;; b) BROWSER=$OPTARG ;; h|?) usage $0; exit 1; ;; esac done # Check the function and find out its file if [ -d "$dir" ]; then match=`grep " [a-zA-Z0-9_]*${func}[a-zA-Z0-9_]*(.*)" -iur $dir | grep "\.[ch]:"` file=`echo "$match" | cut -d ':' -f1` else match="$dir"`grep " [a-zA-Z0-9_]*${func}[a-zA-Z0-9_]*(.*)" -iur $dir` file="$dir" fi [ $? -ne 0 ] && echo "Note: No such function found: $func" && exit 1 echo "Func: $func" [ -z "$file" ] && echo "Note: No file found for $func" && exit 1 # Let users choose the target files fileno=`echo $file | tr -c -d ' ' | wc -c` ((fileno+=1)) if [ $fileno -ne 0 ]; then echo "Match: $fileno" echo "File:" echo " 0 All files under $dir" echo "$match" | cat -n files=($file) read -p "Select: 0 ~ $fileno ? " file_in if [ $file_in -ne 0 ]; then while [ $file_in -lt 1 -o $file_in -gt $fileno ]; do read -p "Select: 1 ~ $fileno ? " file_in done ((file_in-=1)) file=${files[$file_in]} ((file_in+=1)) fi else file_in=1 fi if [ $file_in -ne 0 ]; then [ -z "$file" ] && echo "Note: No file found for $func" && exit 1 echo "File: $file" func=`echo "$match" | sed -n -e "${file_in},${file_in}p" | sed -n -e "s/.* \([a-zA-Z0-9_]*${func}[a-zA-Z0-9_]*\)(.*).*/\1/p"` [ -z "$func" ] && echo "Note: No such function found: $func" && exit 1 else file="`find -L $dir -name '*.c' -or -name '*.h' | tr '\n' ' '`" fi # Genrate the calling tree of this function # Convert it to .dot format with tree2dotx # Convert it to jpg format with dot of Graphviz if [ $file_in -ne 0 ]; then tmp=`echo $file | tr '/' '_' | tr '.' '_'` else tmp="all" fi pic=${func}.${tmp}.${PIC_TYPE} long_pic=${OUT_DIR}/${pic} which cflow >/dev/null 2>&1 if [ $? -ne 0 ]; then echo "Error: cflow doesn't exist, please install it..." exit 1 else [ -n "$depth" ] && depth=" -d $depth " calltree="cflow -b $depth -m " fi which dot >/dev/null 2>&1 [ $? -ne 0 ] && "Error: dot doesn't exist, please install graphviz..." echo "Command: ${calltree}${func} ${file} | ${tree2dotx} "${filterstr}" 2>/dev/null | dot -T${PIC_TYPE} -o $long_pic" ${calltree}${func} ${file} | ${tree2dotx} -f "${filterstr}" 2>/dev/null | dot -T${PIC_TYPE} -o $long_pic # Tell users echo "Target: ${file}: ${func} -> ${long_pic}" # Display it which $BROWSER >/dev/null 2>&1 [ $? -ne 0 ] && exit 0 $BROWSER ${long_pic} >/dev/null 2>&1 &callgraph:#!/bin/bash # # callgraph -- Generate a callgraph of a specified function in specified file/directory # # -- Based on cflow and tree2dotx # # Usage: # # $ callgraph # # -f func_name # -d directory|file # -F filterstr # -D depth # -o directory # # # Output: ../callgraph/func.dir_file_name.svg # # OS OS=$(uname) # Tree2Dot TOP_DIR=$(cd $(dirname $0) && pwd)/ tree2dotx=${TOP_DIR}/tree2dotx # Output directory OUT_DIR=${TOP_DIR}/../callgraph [ ! -d $OUT_DIR ] && OUT_DIR=./ PIC_TYPE=svg # Get browser if [ "x$OS" == "xDarwin" ]; then BROWSER=/Applications/Safari.app/Contents/MacOS/Safari else BROWSER=chromium-browser fi # Default setting # Input: Function Name [Directory Name] func=main dir=./ # Default depth of the tree depth= # filterstr for tree2dotx filterstr="" # Usage function usage { echo "" echo " $0 " echo "" echo " -f func_name" echo " -d directory|file" echo " -F filterstr" echo " -D depth" echo " -o directory" echo "" } while getopts "F:f:d:D:o:b:h" opt; do case $opt in F) filterstr=$OPTARG ;; f) func=$OPTARG ;; d) [ -n "$OPTARG" ] && [ -f "$OPTARG" -o -d "$OPTARG" ] && dir=$OPTARG ;; D) depth=$OPTARG ;; o) output=$OPTARG [ ! -d "$output" ] && mkdir -p $output OUT_DIR=$output ;; b) BROWSER=$OPTARG ;; h|?) usage $0; exit 1; ;; esac done # Check the function and find out its file if [ -d "$dir" ]; then match=`grep " [a-zA-Z0-9_]*${func}[a-zA-Z0-9_]*(.*)" -iur $dir | grep "\.[ch]:"` file=`echo "$match" | cut -d ':' -f1` else match="$dir"`grep " [a-zA-Z0-9_]*${func}[a-zA-Z0-9_]*(.*)" -iur $dir` file="$dir" fi [ $? -ne 0 ] && echo "Note: No such function found: $func" && exit 1 echo "Func: $func" [ -z "$file" ] && echo "Note: No file found for $func" && exit 1 # Let users choose the target files fileno=`echo $file | tr -c -d ' ' | wc -c` ((fileno+=1)) if [ $fileno -ne 0 ]; then echo "Match: $fileno" echo "File:" echo " 0 All files under $dir" echo "$match" | cat -n files=($file) read -p "Select: 0 ~ $fileno ? " file_in if [ $file_in -ne 0 ]; then while [ $file_in -lt 1 -o $file_in -gt $fileno ]; do read -p "Select: 1 ~ $fileno ? " file_in done ((file_in-=1)) file=${files[$file_in]} ((file_in+=1)) fi else file_in=1 fi if [ $file_in -ne 0 ]; then [ -z "$file" ] && echo "Note: No file found for $func" && exit 1 echo "File: $file" func=`echo "$match" | sed -n -e "${file_in},${file_in}p" | sed -n -e "s/.* \([a-zA-Z0-9_]*${func}[a-zA-Z0-9_]*\)(.*).*/\1/p"` [ -z "$func" ] && echo "Note: No such function found: $func" && exit 1 else file="`find -L $dir -name '*.c' -or -name '*.h' | tr '\n' ' '`" fi # Genrate the calling tree of this function # Convert it to .dot format with tree2dotx # Convert it to jpg format with dot of Graphviz if [ $file_in -ne 0 ]; then tmp=`echo $file | tr '/' '_' | tr '.' '_'` else tmp="all" fi pic=${func}.${tmp}.${PIC_TYPE} long_pic=${OUT_DIR}/${pic} which cflow >/dev/null 2>&1 if [ $? -ne 0 ]; then echo "Error: cflow doesn't exist, please install it..." exit 1 else [ -n "$depth" ] && depth=" -d $depth " calltree="cflow -b $depth -m " fi which dot >/dev/null 2>&1 [ $? -ne 0 ] && "Error: dot doesn't exist, please install graphviz..." echo "Command: ${calltree}${func} ${file} | ${tree2dotx} "${filterstr}" 2>/dev/null | dot -T${PIC_TYPE} -o $long_pic" ${calltree}${func} ${file} | ${tree2dotx} -f "${filterstr}" 2>/dev/null | dot -T${PIC_TYPE} -o $long_pic # Tell users echo "Target: ${file}: ${func} -> ${long_pic}" # Display it which $BROWSER >/dev/null 2>&1 [ $? -ne 0 ] && exit 0 $BROWSER ${long_pic} >/dev/null 2>&1 &给所有用户这两个文件的可执行权限
chmod u+x tree2dotxchmod u+x callgraph安装
gawksudo apt-get install gawk
将需要分析的 cpp 文件放到上面那两个文件所在的目录下(以 main.cpp 含 main() 函数为例)
分析 main.cpp 文件中的 main 函数:
./callgraph -f main -d ./main.cpp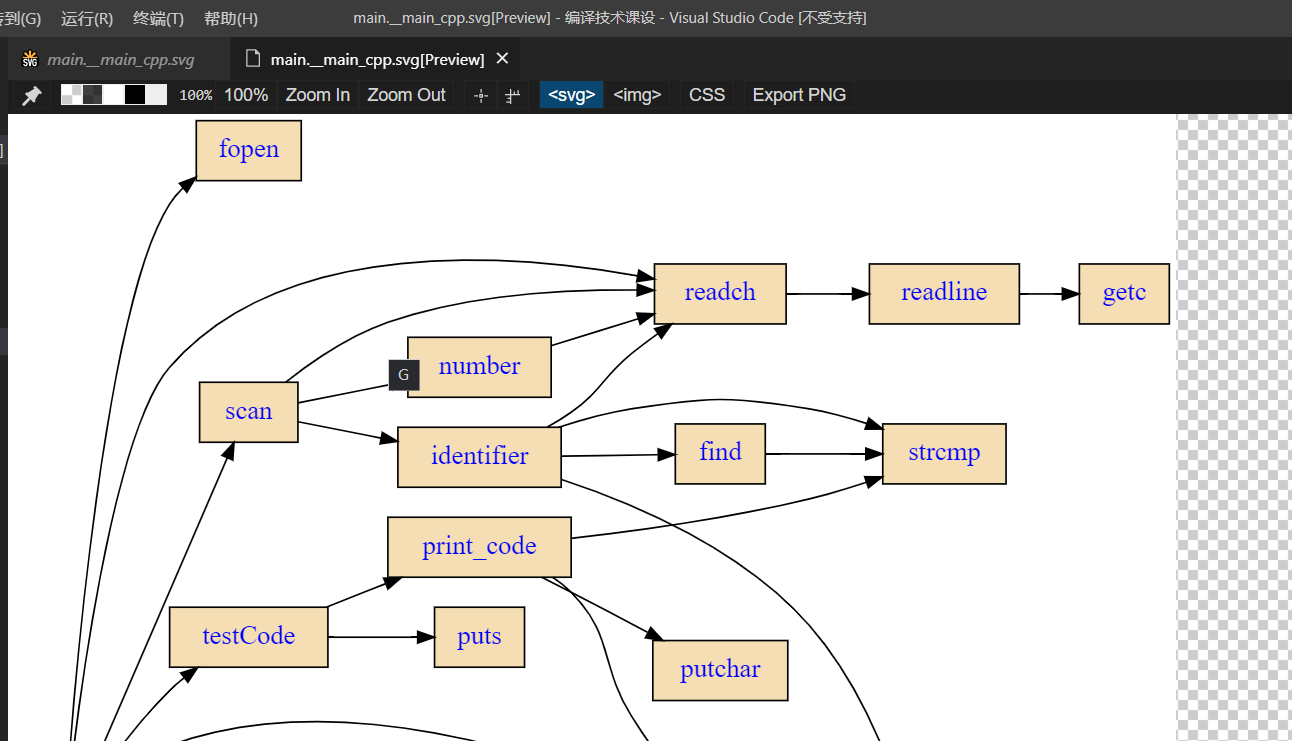
tceetree + cscope + Graphviz
- 远古命令行操作, 貌似很旧了, 个人复现完成了但是没有完全完成, 所以只附个索引在这里(主要还是操作繁琐而且基本都是命令行操作, 我认为应该存在更有效的替代方式)
- 官网Wiki: tceetree / Wiki / Home (sourceforge.net)
cscope 的 win 版本需要访问 Google Code
VisualStudio Code Graph 扩展
直接在 VS 扩展管理中搜索安装即可
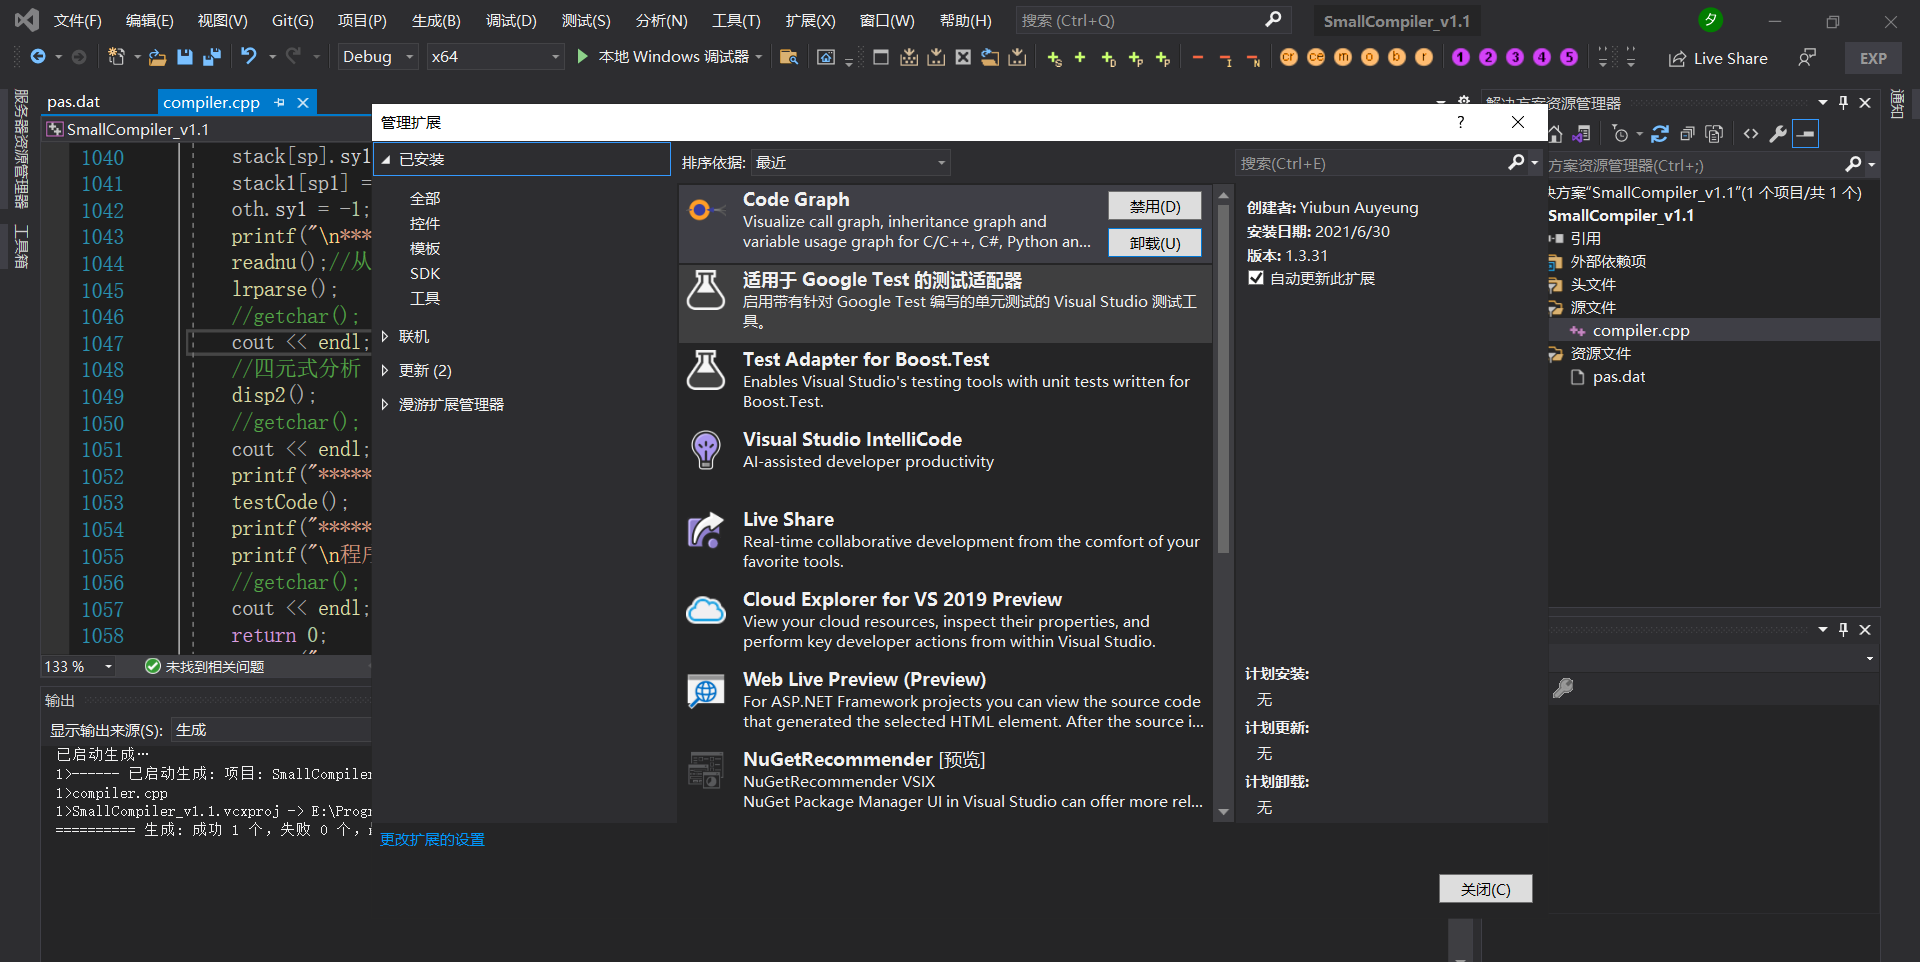
貌似不错的样子, 但是结点要自行拉取, 所以我也只是浅尝辄止
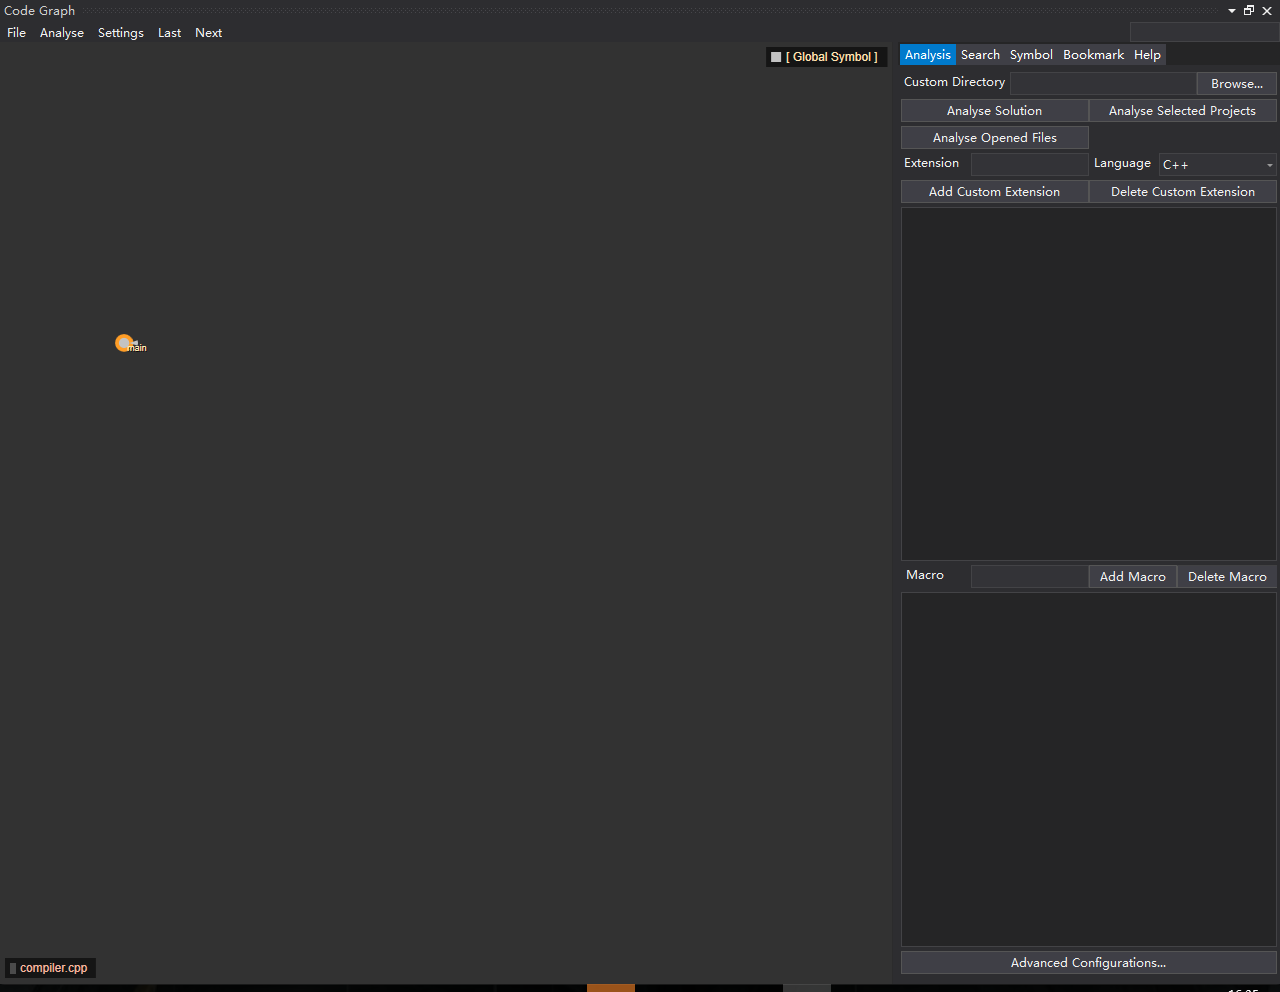
官方教程: Code Graph - Visual Studio Marketplace
CppDepend
- 安装按成后才发现是一款代码分析软件, 还挺新的, 有 2021 的 FreeTrial 版本
安装过程需要从国际互联网拉取更新
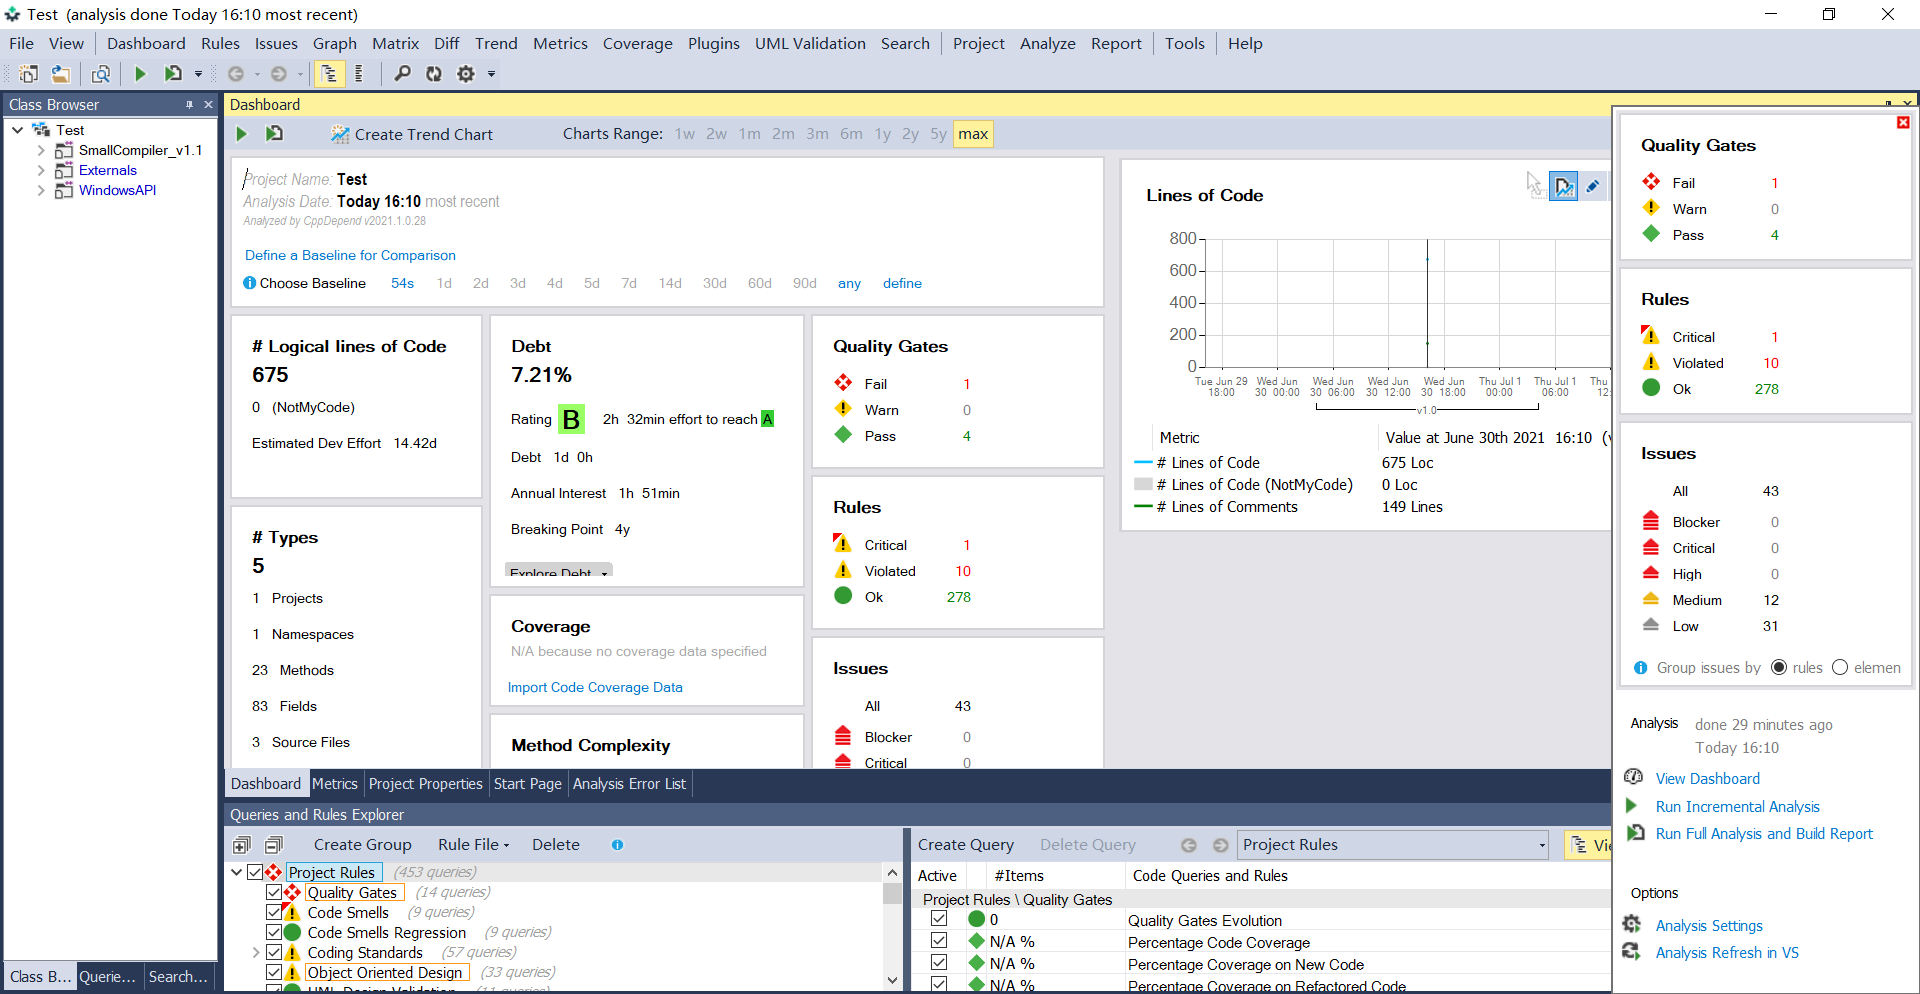
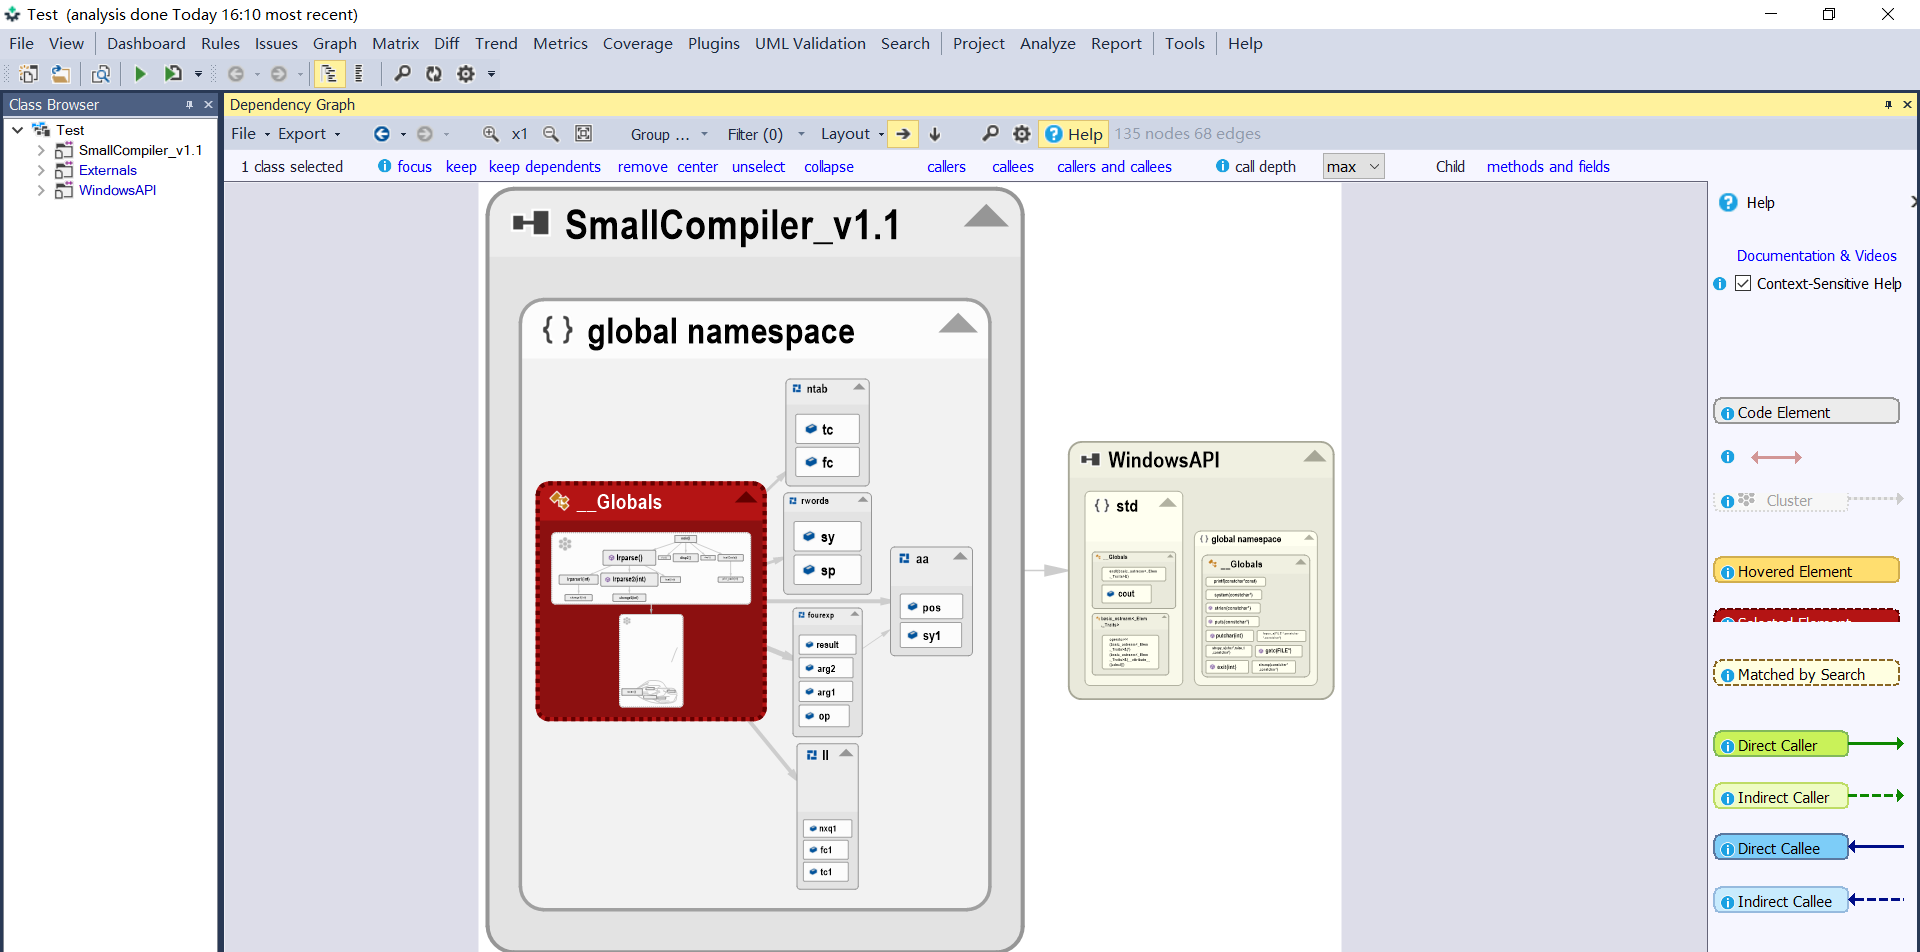
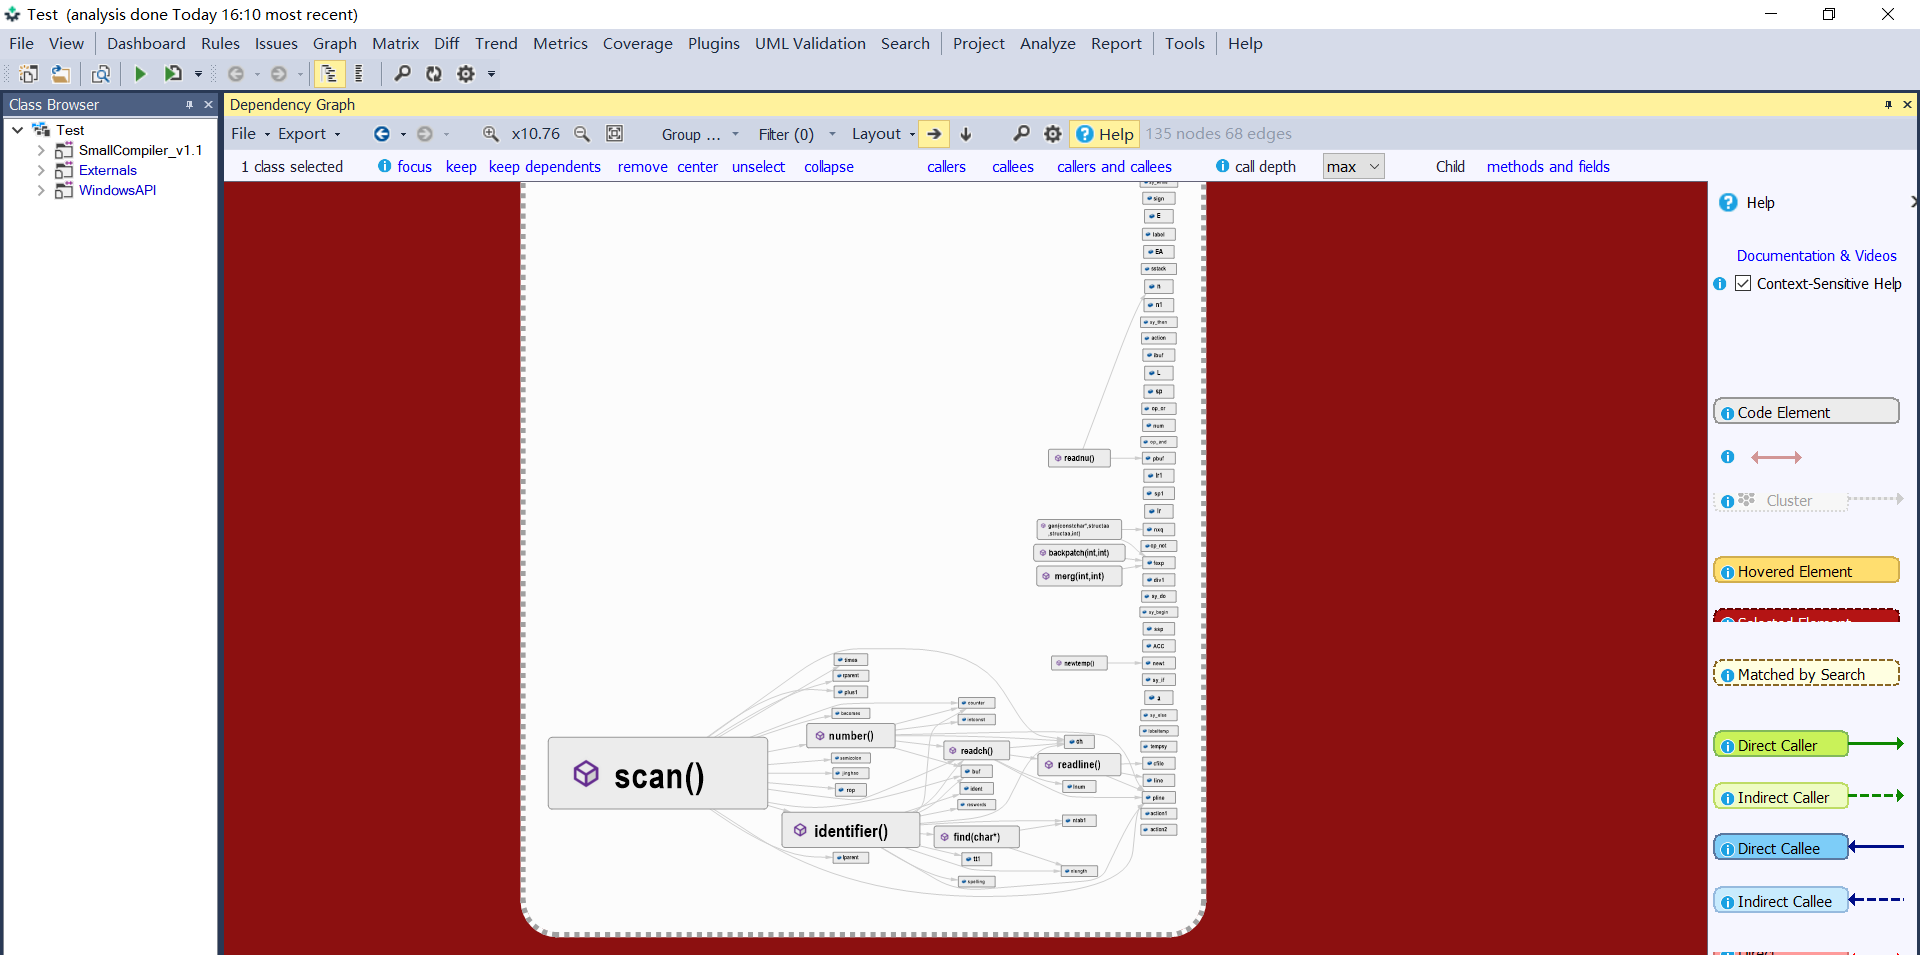
- 个人使用体验确实不错, 只可惜 FreeTrial 只有 14 天试用, 个人付费又不是很合算, 中文互联网上相关信息又比较少, 不过这基本上算是给了我一个思路->代码分析工具, 那么就可以找寻相应国产或者中文互联网主流的代码分析工具试着看看有没有类似的功能可以为我所用
检索能力有限, 最终还是决定先用着 CppDepend, 它确实很对我胃口🤣
数据结构
结构体
初始化
c++结构体几种初始化方法_skywf的博客-CSDN博客_c++ 结构体初始化
构造函数使用 : 快捷赋值
结构体名(形参) : 成员变量1(形参1) ,成员变量2(形参2) {};
#include <iostream>
using namespace std;
struct test_struct{
int a;
char b;
test_struct(int a=0, char b='b'): a(a), b(b){}
};
int main(){
test_struct tmp1;
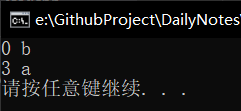
test_struct tmp2(3,'a');
cout<<tmp1.a<<" "<<tmp1.b<<endl;
cout<<tmp2.a<<" "<<tmp2.b<<endl;
return 0;
}
实例化时使用 {} 赋值初始化
#include <iostream>
using namespace std;
struct test_struct{
int a;
char b;
};
int main(){
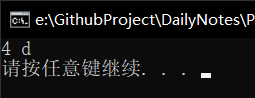
test_struct tmp3 = {4, 'd'};
cout<<tmp3.a<<" "<<tmp3.b<<endl;
return 0;
}
老老实实写构造函数初始化
#include <iostream>
using namespace std;

struct test_struct{
    int a;
    char b;
    test_struct(int a, char b){
        this->a = a;
        this->b = b;
    }
};

int main(){
    test_struct tmp4(5,'a');
    test_struct tmp5 = {6, 'e'};
    cout<<tmp4.a<<" "<<tmp4.b<<endl;
    cout<<tmp5.a<<" "<<tmp5.b<<endl;
    return 0;
}

支持将定义结构体和实例化结构体写在一起
#include <iostream>
using namespace std;

struct test_struct{
    int a;
    char b;
    test_struct(int a, char b){
        this->a = a;
        this->b = b;
    }
}tmp6 = {7, 'k'};

int main(){
    cout<<tmp6.a<<" "<<tmp6.b<<endl;
    return 0;
}

字符串
std::strcmp
定义于头文件
<cstring>int strcmp( const char *lhs, const char *rhs );以字典序比较二个空终止字节字符串。
结果的符号是被比较的字符串中首对不同字符(都转译成 unsigned char ) 的值间的差值符号。
若
lhs或rhs不是指向空终止字节字符串的指针,则行为未定义。参数
lhs, rhs - 指向待比较的空终止字节字符串的指针 返回值
若字典序中
lhs先出现于rhs则为负值。若
lhs与rhs比较相等则为零。若字典序中
lhs后出现于rhs则为正值。
关于字符串与数字互相转换
若当前字符串内容确实为整数, 那么可以通过
当前字符 - '0'返回一个整数#include <iostream> using namespace std; int main(){ cout<<'9'-'0'<<endl; return 0; }
规范性
头文件源文件
- 函数和变量可以在头文件中声明然后在源文件中定义, 但是常量最好直接在头文件中声明并定义, 分离开的话容易报错
在头文件中使用外部定义变量时, 在相应源文件中务必在函数外先进行一次初始化, 如果依赖函数进行初始化的话那也要先初始化为空, 否则会引起连接器错误;
个人理解类似空的构造函数, 如果要先实例化对象后调用初始化函数进行初始化的话, 那么在实例化变量时会调用默认的(或者自定义的)空构造函数先进行一次"空初始化"
类似的在头文件外部定义的变量在源文件里要初始化, 如果要用函数初始化的话那么需要先进行一次"空初始化"
static 变量在头文件使用外部定义的时候 extern 与 static 冲突, 去掉 static 即可, 毕竟都头文件外部定义了, 该变量仅此一份不与对象绑定, 已经是个静态变量了
注释相关
行尾使用 // 进行注释, 或者在当前行的上面一行使用 // 注释, 或者在当前行的上面一行或多行使用 /* */进行块注释
需要注意的是光标移到变量上会显示的注释是变量定义时的注释
也就是说如果在头文件中声明在源文件中定义的话, 那么光标移到变量上看到的注释是源文件中定义变量时给出的注释
函数
引用
C++ Primer Plus Chapter8.2
C++ 新增了一种复合类型 -- 引用变量; 引用是已定义的变量的别名;
C++ 为 & 符号赋予了除指示变量地址的另一个含义 -> 用于声明引用
// 例:
int rats;
int & rodents = rats;  // makes rodents an alias for rats
- 在声明引用的同时也必须将其初始化
- 引用一经与某个变量关联起来就将一致效忠于此变量