Git
Git
Git飞行规则-git-flight-rules/README_zh-CN.md at master · k88hudson/git-flight-rules (github.com)
查看与升级版本
How to upgrade Git on Windows to the latest version - Stack Overflow
# 查看版本
git --version
# 升级 windows git
git update-git-for-windows
版本 > 2.16.1 则使用: git update-git-for-windows 版本 2.14.2-2.16.1 则使用: git update 版本 <2.14.2 请重新下载安装覆盖
命令执行完毕后弹出 git 安装弹窗, 根据提示进行安装即可
通过命令行下载慢的话可以选择 Git (git-scm.com) 下载 exe 执行更新即可
安装与配置相关
安装
Linux
Debian/Ubuntu
# 更新源
apt update 	# 只检查,不更新
apt upgrade	# 更新已安装的软件包
# 安装最新版本的 git
apt-get install git
# For Ubuntu, this PPA provides the latest stable upstream Git version
add-apt-repository ppa:git-core/ppa
apt update
apt install git
PPA
Ubuntu PPA 使用指南 - 知乎 (zhihu.com)[很详细]
What is PPA in Ubuntu Linux and How Do I Use Them (ubuntupit.com)
PPA 表示 个人软件包存档(Personal Package Archive)。
在这里注意 “个人” 这个词,它暗示了这是开发人员独有的东西,并没有得到分发的正式许可。
软件仓库是一组文件,其中包含各种软件及其版本的信息,以及校验和等其他一些详细信息。每个版本的 Ubuntu 都有自己的四个官方软件仓库:
Main- Canonical 支持的自由开源软件。Universe- 社区维护的自由开源软件。Restricted- 设备的专有驱动程序。Multiverse- 受版权或法律问题限制的软件。
PPA 基本上是一个包含软件信息的网址, 这些信息存储在 /etc/apt 目录中的 sources.list 文件中
当运行 sudo apt update 命令时,系统将使用 APT 工具 来检查软件仓库并将软件及其版本信息存储在缓存中。当使用 sudo apt install package_name 命令时,它通过该信息从实际存储软件的网址获取该软件包
如果软件仓库中没有关于某个包的信息, 将会报错
E: Unable to locate package
Ubuntu 对系统中的软件进行管理,更重要的是控制你在系统上获得哪个版本的软件
Ubuntu 不会立即提供该新版本的软件。需要一个步骤来检查此新版本的软件是否与系统兼容,从而可以确保系统的稳定性。
这就需要 PPA
Ubuntu 提供了一个名为 Launchpad 的平台,使软件开发人员能够创建自己的软件仓库。终端用户,也就是你,可以将 PPA 仓库添加到 sources.list 文件中,当你更新系统时,你的系统会知道这个新软件的可用性,然后你可以使用标准的 sudo apt install 命令安装它。
# 将 PPA 仓库添加到列表中
sudo add-apt-repository ppa:dr-akulavich/lighttable
# 更新可以在当前系统上安装的软件包列表。
sudo apt-get update
# 安装软件包。
sudo apt-get install lighttable-installer
配置
git config --global user.email "GitHub绑定邮箱"
git config --global user.name "GitHub用户名"
场景
同步框架开发
需求: 使用了一个前端框架项目作为我的项目的初始框架, 在保持框架能够通过git更新的同时维护我当前项目的git
解决方案: 在一个分支上保持与原始框架的同步,然后在另一个分支上进行开发。当框架有更新时,将更新合并到开发分支。
具体流程:
clone 自己的远程仓库并 cd 到仓库根目录
添加框架的远程仓库:
git remote add upstream <框架的仓库URL>这将在当前 Git 仓库中添加一个名为 "upstream" 的远程仓库,该仓库的 URL 是框架的仓库 URL。
从框架的远程仓库拉取代码:
git pull upstream master这将从 "upstream" 远程仓库的 "master" 分支拉取最新的代码
后续要合并框架更新的划也可以用如下命令
git fetch upstream
git merge upstream/master
首次合并会因为没有共同 commit 报错
fatal: refusing to merge unrelated histories此时可以
git merge upstream/master --allow-unrelated-histories
仓库相关
查看远程仓库地址
git remote -v
常规操作
# stage 当前所有修改
git add .
# commit 并加备注
git commit -m "备注"
# 推送到 origin master
git push origin master
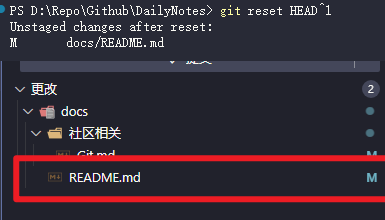
撤销提交
当提交信息出问题或者当次提交没有勾全文件的时候可以撤销本次的提交, 当本次提交还没有 push 的时候可以采用如下方案
# 撤销上一次提交
git reset HEAD~1
# 撤销上一次提交并保留 stash
git reset HEAD~1 --soft
# 撤销并放弃上一次提交(就是上次提交的修改完全删除了)(慎用)
git reset HEAD~1 --hard

分支操作
# 新建并转移到 bugFix 分支
git checkout -b bugFix
# 提交
git commit
# 返回 master 分支
git checkout master
# 拉取主分支更新(并处理冲突)
git pull
# 返回 bugFix 分支, 合并 master 分支更新
git checkout bugFix
git merge master
git push
# 合并 bugFix 分支
git merge bugFix
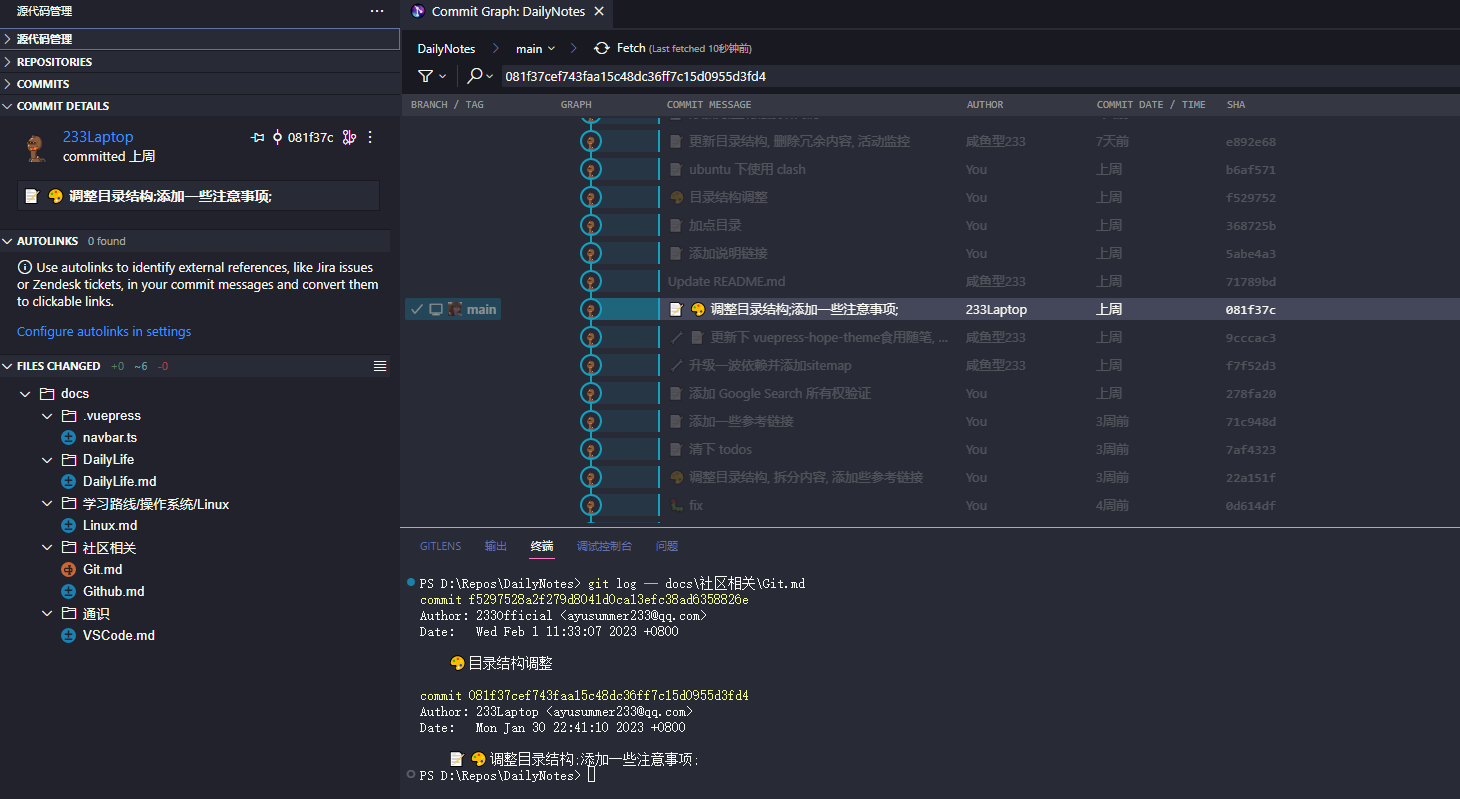
查看某个文件变动的所有历史记录
[小技巧] git 中查看某个文件是什么时候被删除的_HaveFunInLinux的博客-CSDN博客_git 查看某个文件什么时候被删除
git log -- [file_path]
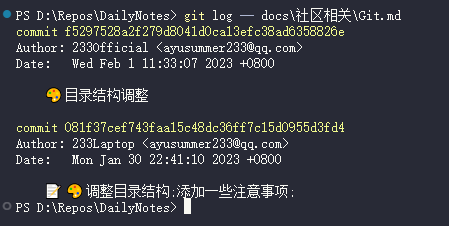
得到 commit id 之后就可以根据这个 id 查询对应的提交记录了
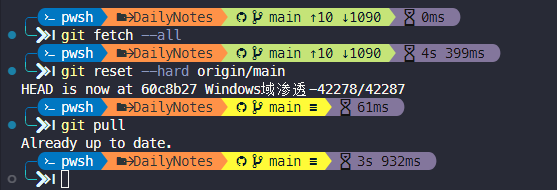
强制拉取远程更新覆盖本地仓库
git fetch --all
git reset --hard origin/main
git pull
批量修改提交名称与邮箱
# 遍历仓库中的所有提交, 将指定的提交者的名字和邮箱修改为新的名字和邮箱
git filter-branch --env-filter '
if [ "$GIT_COMMITTER_EMAIL" = "origin_email" ]; then
    export GIT_COMMITTER_EMAIL="new_email
fi
if [ "$GIT_AUTHOR_EMAIL" = "origin_email" ]; then
    export GIT_AUTHOR_EMAIL="new_email"
fi
if [ "$GIT_COMMITTER_NAME" = "origin_name" ]; then
    export GIT_COMMITTER_NAME="new_name"
fi
if [ "$GIT_AUTHOR_NAME" = "origin_name" ]; then
    export GIT_AUTHOR_NAME="new_name"
fi
' --tag-name-filter cat -- --branches --tags
然后 git push -f
如果提示无法强制推送则需要到仓库设置中允许该操作
relations
code996
hellodigua/code996: code996 是一个分析工具,它可以统计 Git 项目的 commit 时间分布,进而推导出这个项目的编码工作强度 (github.com)
code996 是一个分析工具,它可以统计 Git 项目的 commit 时间分布,进而推导出这个项目的编码工作强度。
Mac 或 Linux 用户:
在 Git 项目的根目录,执行以下命令:
curl -fsSL https://fastly.jsdelivr.net/gh/hellodigua/code996/bin/code996.sh | bash
或者下载
https://fastly.jsdelivr.net/gh/hellodigua/code996/bin/code996.sh后直接bash code996.sh
Windows 用户:
下载该脚本 https://fastly.jsdelivr.net/gh/hellodigua/code996/bin/code996.sh
然后将该脚本移至要分析的 Git 项目目录,并执行以下命令:
iwr https://fastly.jsdelivr.net/gh/hellodigua/code996/bin/code996.ps1 -OutFile ([System.IO.Path]::Combine([System.IO.Path]::GetTempPath(), 'code996.ps1')); & ([System.IO.Path]::Combine([System.IO.Path]::GetTempPath(), 'code996.ps1')); ri ([System.IO.Path]::Combine([System.IO.Path]::GetTempPath(), 'code996.ps1'))
需要使用 PowerShell 7 或更高版本
learnGitBranching
Github 仓库拉取速度可能会比较慢, 所以可以将其导入到 Gitee 仓库中: learnGitBranching: https://github.com/pcottle/learnGitBranching 学习 Git, 用于个人部署 (gitee.com)
选择一台设备装好 Python 和 nodejs+yarn 并配置好 Git, 本次试验环境为 ubuntu16.04
# Ubuntu 安装 nodejs 16
curl -fsSL https://deb.nodesource.com/setup_16.x | sudo -E bash -
sudo apt-get install -y nodejs
# 持久换淘宝源
npm config set registry https://registry.npm.taobao.org
# 查看换源是否生效
npm config get registry

# 安装 yarn
curl -sS https://dl.yarnpkg.com/debian/pubkey.gpg | sudo apt-key add -
echo "deb https://dl.yarnpkg.com/debian/ stable main" | sudo tee /etc/apt/sources.list.d/yarn.list
sudo apt update
sudo apt install yarn
# clone 仓库
git clone https://gitee.com/ayusummer233/learnGitBranching.git
# 安装依赖
yarn install
yarn gulp fastBuild # skips tests and linting, faster build
yarn gulp build # runs tests and lint
# 使用 screen 创建一个窗口(或者使用 tmux 或者 zellij 均可)
screen -S gitLearn
# 使用 Python http.server 部署到本地 9222 端口(或随便换个自己喜欢的端口)
python -m http.server 9222
# Ctrl A D 挂起当前 screen
常见问题
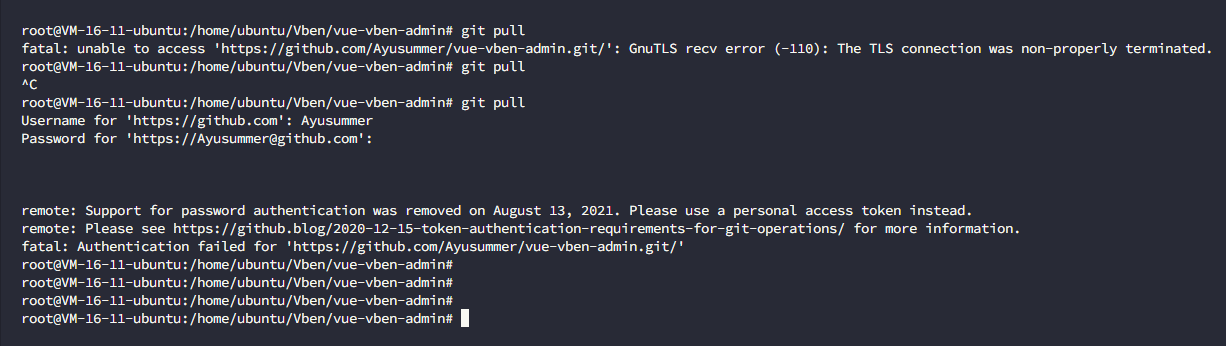
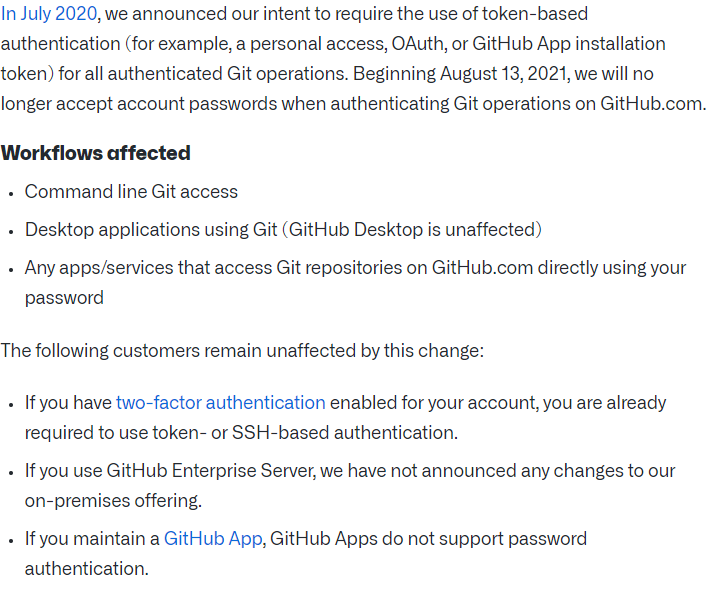
fatal: Authentication failed
Token authentication requirements for Git operations | The GitHub Blog
remote: Support for password authentication was removed on August 13, 2021. Please use a personal access token instead. remote: Please see https://github.blog/2020-12-15-token-authentication-requirements-for-git-operations/ for more information. fatal: Authentication failed for 'https://github.com/Ayusummer/vue-vben-admin.git/'
需要在 github 上创建一个私有的 access token 来用
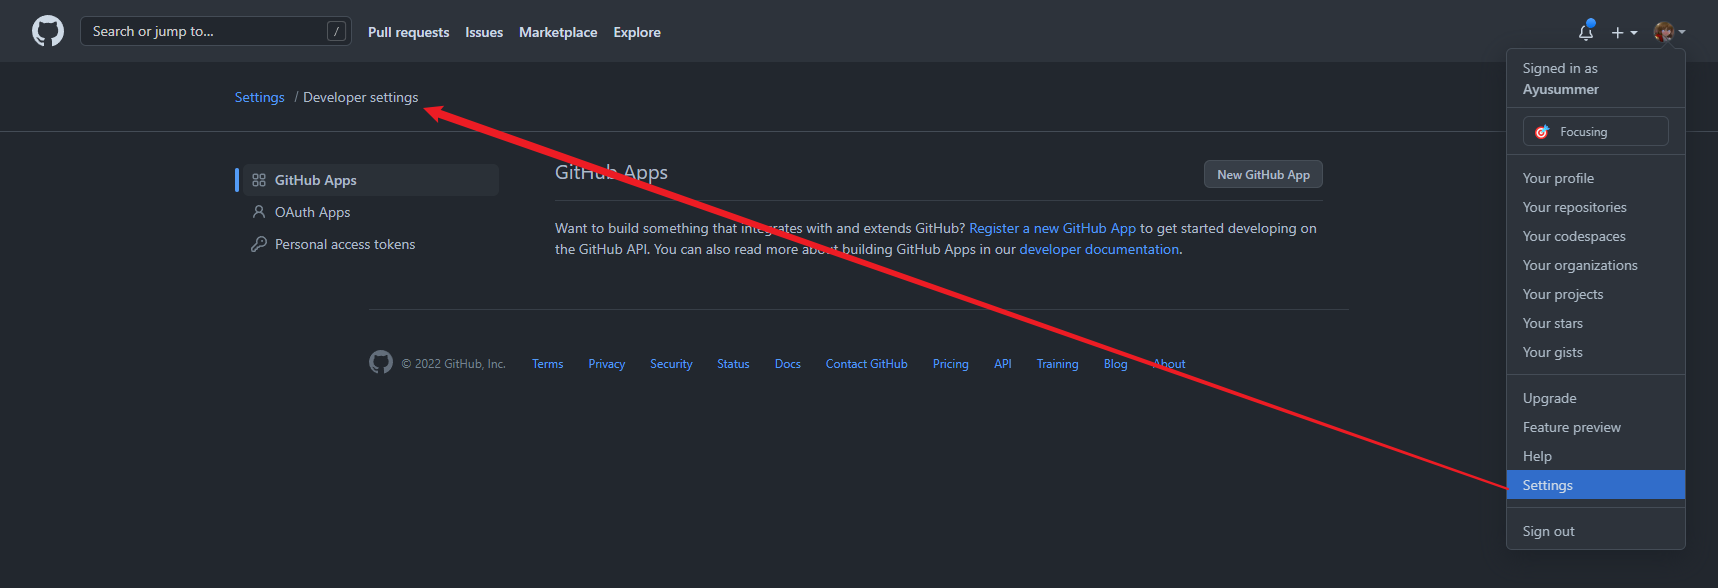
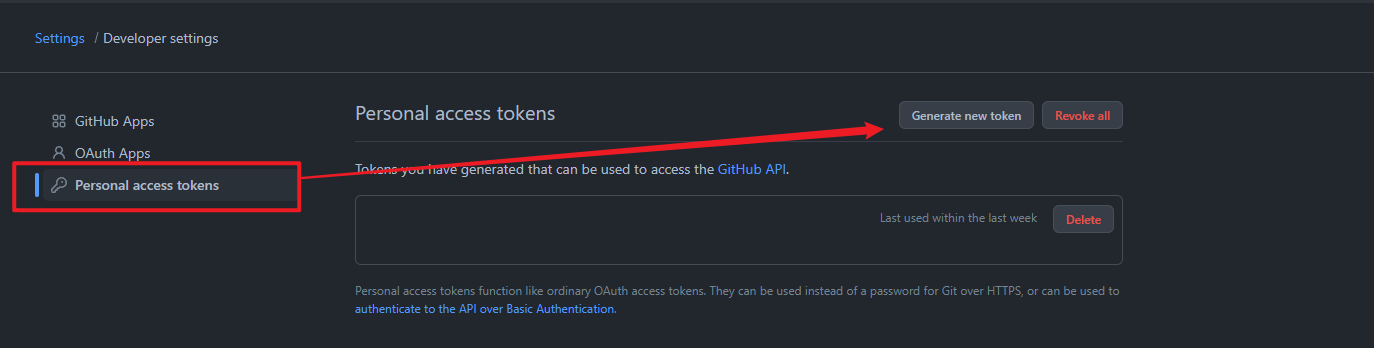
填写自拟的token名并设置过期时间以及权限后点击页面左下角的 Generate token创建即可
Warning: Treat your tokens like passwords and keep them secret. When working with the API, use tokens as environment variables instead of hardcoding them into your programs.
然后就可以通过 username 和 token 来进行一些权限操作了
filename too lang
git config --system core.longpaths true
拉取时间过长
排除了网络问题后, 如果仓库过大导致拉取时间很长, 可以尝试只 clone 到最近一次提交:
git clone xxxxxxx --depth 1